Calcium for bone health

I’ve never been a fan of numbers, not in maths at school nor in my work as a nutritionist. Counting calories, for instance, has not been a tool I’ve wanted or needed when helping people gain or lose weight. Not only can calorie counting rob food of its delight and purpose, but it can morph into an unhealthy preoccupation, become disordered, turning into a cause of mental distress.  There are far easier and more enjoyable ways to lose or gain weight.

Back to numbers.  Despite all the above proclamations I have been counting over the past month, not calories or days till our hols, but milligrams of calcium.

This is mainly due to two women I saw in clinic, both of whom have osteopenia (reduced bone density) and are concerned about the progression to osteoporosis, a disease of serious bone loss and fragility. This alerted me, among other alerts, to their calcium intake.

Both their food diaries showed a distinct lack of calcium foods.  One woman, in her early fifties, is lactose intolerant and therefore not eating dairy (dairy being the biggest calcium source, although admittedly not always well absorbed due to other health factors).
The second client, in her early sixties, is following a vegan diet which, again, lacks these dairy sources, but is also low in the stand-out calcium-rich vegetables, and too high in spinach intake – a calcium blocker – and low in fortified plant yoghurts or mylks.

Osteoporosis is known as the silent killer.  We don’t know we have it, that we’re losing bone, until we fall or simply trip, and end up with a fracture.  Or a tooth falls out, or gum disease is advanced.  Our blood and body tissues require stable calcium levels, so if we’re not ingesting/absorbing enough calcium from food our bodies will rob calcium from our stores, namely from our bones.  Back pain, a stooped posture, loss of height, these are all possible early signs of bone loss before that fracture happens, so, if this speaks to you, or if osteoporosis is in the family, I’d recommend asking for a bone density scan to assess your risk.

Women, especially menopausal women over 50, are more susceptible to osteoporosis (bottom line is that our bone-protective oestrogen does a dive in menopause).  Other reasons for this susceptibility include lifespan – women tend to live longer than men – and also women generally have smaller, more delicate bones which means less mass to lose without consequences.
However, diet, gut health, hormones, inflammation, genetics, exercise, all play a role in bone health, so if any of these are stacked against you then, male or female, you may be susceptible.  An excellent book about osteo by someone who had it is by Keith McCormick  , a male, case in point.

Back to counting.
Ideally, if you’re a woman over 50, you want to aim for 1200 mg daily calcium intake.  For women between 19 and 50 years it’s 1000 mg;  for men 19-70 it’s also 1000 mg.  And after 70 years, 1300 mg is the recommended daily intake for both men and women.

There are many books on osteoporosis with meal plans and recipes which will be looking at the total picture and which I’d highly recommend for anyone concerned about their bones.  However, if it’s calcium alone that you’re now thinking about because perhaps you don’t eat dairy, or you’re wondering whether you should supplement, there are online calcium calculators, a free way of working out your daily calcium intake.  These calculator sites are not an exact science, I’ll say that now.  There are some discrepancies between them which I’m assuming are due to variations in growing methods, countries, environmental conditions at source, and processing.

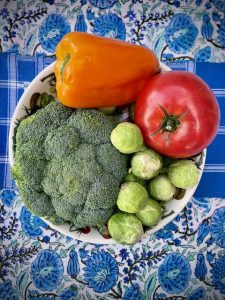
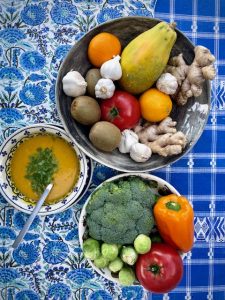
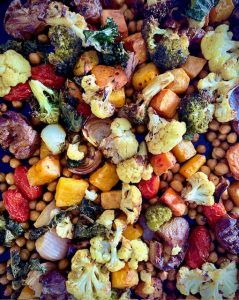
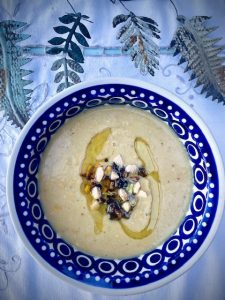
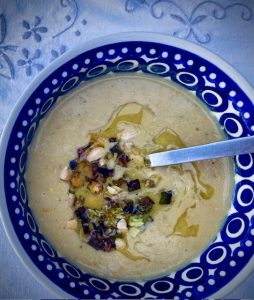
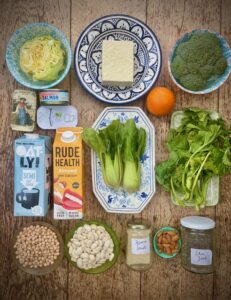
However, the general message is pretty clear.  There are some stand out plant-based calcium sources.  As far as vegetables are concerned, kale, turnip greens, broccoli, bok choy, chinese cabbage are all leafy greens with high to high-medium calcium levels.
Chickpeas, navy beans, soybeans and white beans have good amounts.  Almonds are high in calcium (also high oxalates so go easy), and sesame seeds are high (think tahini paste in dressings, sauces…)
Two dried figs will give a 65mg hit and an orange 55 mg.
In addition, choosing a calcium fortified plant mylk or plant yoghurt will make a big daily difference.

And if you eat animal protein, a small can of sardines in your lunch salad will pack a big punch, more than canned salmon with bones, which is nonetheless a good source.  Eggs surprise me as they give us so much, but here they offer very little calcium (unless you munch on the shell, which I’d not recommend),

These above-mentioned foods – as well as dairy, of course –  kept coming up on various sites.  There was good consensus about their calcium worth.  I used the International Osteoporosis Foundation calcium calculator list as well as the Bone health and osteoporosis foundation, and an NHS site.
When I couldn’t find some foods I like to eat (samphire or seaweeds), I typed in amount of calcium for that food.  I cross checked a few because of some oddities (who the heck is eating uncooked chickpeas or raw butterbeans?); also due to some striking variances in Ca milligram amounts.  As stated above, I can only put this down to different sources, growing conditions in different countries/oceans and different processing.

Googling lists, and checking milligram in calcium may feel a bit ho-hum tedious, but you only need to do the maths once, then you have your very own calcium score.

Apart from the above, I’ve listed below a few random high-to-moderate calcium foods to help you get started.  Also some info about oxalate foods, which can block calcium.  I’ve included a few of the disparate ranges from different sites in the hope that someone out there will find some definitives – let me know please 🙂

A final word, no maths, no counting.
When it comes to health, very little works in isolation. Strong bones are not simply about calcium, but this post isn’t about the other players like magnesium and phosporus, boron, D3 and K2.  Nor is it about the importance of gut health and nutrient absorption, immunomodulation, and the gut-brain-bone axis.  I’m also not touching on the very essential role resistance or weight-bearing exercise plays, how it stimulates bones, egging them on to remodel and strengthen; the same mindset as use it or lose it, or do or die.

I’ve focused on calcium because it’s so often NOT on our radar, and also because food is a safe way to improve our calcium levels.
Saying that, if your calcium intake remains low even with some food changes, you can now work out how low it is, and supplement accordingly, instead of taking a one-size-fits-all high dose which may cause bloating or digestive issues and potentially lead to hypercalcaemia, kidney stones or possible heart problems.  There are a number of calcium supplements which range from low to higher levels. Contact me if you can’t find them.
And if you’d like to read more about bones, the full gamut on how to avoid osteoporosis, the above McCormick book, The Whole body approach to Osteoporosis, is very good. However, there are many other good books out there.

Wishing you all a happy weekend, and if you’re in a sunny place, grab lots of Vit D3.  Among many other talents, Vitamin D3 is also a big player in bone health 🙂


Food list:

kale, cooked, 1 cup/c130g = 170-200mg calcium
broccoli, cooked 90g   =  50 – 100mg (yes, different lists!)
bok choy, cooked 70g = 160 – 180mg
turnip greens, cooked 52g = 100 – 190 mg
2 dried figs = 65 mg
1 orange = 55 mg
tahini, one tbsp, 15g = 50 – 60mg
tofu, firm, 100g = 120 – 300 mg
plant-based mylk, soy, almond, oat 100 ml = 120mg (a chai latte therefore could be c 240mg Ca)
chickpeas, 100g = 60 – 100mg
soybeans, 150g = 170-470mg (!)
white beans (eg. butterbeans, cannellini beans) 1 cup = 160mg
canned sardines or pilchards, small tin = 350 mg (however I also found a list stating 500mg – due perhaps to different ocean source & processing?)
canned salmon with bones, small tin:  70mg – 200mg (one source, Cheena, a Canadian wild sockeye states a whopping 2000mg for their large 180g can)
almonds, 10 nuts, c 12g = 32mg
sesame seeds, 15g = 100 mg
kelp (like kombu) and wakame, 100g =  150 – 168mg
samphire, 100g = 150mg

Dairy:
cheddar, 30g = 240 mg
fetta, 60g= 270 mg
full fat yoghurt, 170g = 310 – 380mg
semi skmmed milk, 200ml = 240mg

Note: spinach has high calcium content but is also a very high oxalate vegetable, much higher than, say, kale.  It is often mentioned as NOT being a recommended calcium source food since oxalates are compounds that bind with minerals, preventing their absorption;  minerals such as calcium and magnesium.  So it would be wise to eat far less-to-no spinach if you have osteopenia.  If you do a search for high oxalate foods you may find you’re eating too many of them daily, so, reducing them would be recommended if you are concerned about bone loss.  

Green cannellini beans with rice

There’s good reason why cultures like Mexico, Africa or South America often eat rice with their beans.  By combining the two you get a complete protein meal with all 9 essential amino acids.  Beans are low in methionine (= amino acid), but rice is quite high.  Rice is low in lysine (another amino acid), but beans have good levels.  A perfect union!

This recipe has the added benefit of hemp seed and nutritional yeast, both complete proteins, albeit in small amounts, hence my suggestion to have rice alongside.  I usually choose a brown, red and basmati mix which I rinse twice before cooking.  Often I’ll add small florets of broccoli or grated carrot into the pot 3/4 way through the cooking time; another opportunity to increase vegetables in meals.

When it comes to protein you might like to listen to this interview on The Doctor’s Kitchen, with Rupi Aujla.  If it sounds like I’m banging on about protein it’s because I’m seeing really low intake in my clinic. With the message out there that people should be eating more plant-based foods, many are reducing their animal protein but not finding plant based alternatives.

Inspired by a recipe from Plantbaes I’ve changed some ingredients and amounts, replacing the spinach with kale or greens because raw spinach is high in oxalates which can interfere with our absorption of minerals necessary for strong bones and energy, hormones, immune health… you name it.  Easy to google ‘high oxalate’ foods if you want to go down this rabbit hole!

Ingredients:

1 tbsp virgin olive oil for cooking; another tbsp to drizzle before serving
4 medium garlic cloves, pressed
1 red onion, chopped
1 medium or 2 small courgette, sliced
1 bunch of basil, c 25 – 30g
50 g chopped kale and/or spring greens
2 tbsp cracked hemp seed
2 tbsp nutritional yeast
2 tbsp lemon juice
1  400g tin rinsed-twice cannellini beans
2 tbsp pumpkin seeds, for serving
sea salt and black pepper
plant-based yoghurt to dollop on top before serving

Optional: sprinkling of chilli flakes added to blender

Method

Whilst your rice is cooking, pour oil into a pan and add the chopped onion. Cook on a medium heat for a few minutes until transparent.  Next add the squeezed or finely chopped garlic, then the sliced courgette and kale/spring greens.  Cover and cook until the kale has softened.  Turn off the heat and add the basil leaves to the pan with cover and leave a couple of minutes.

Put the cooked greens and wilted basil into a bowl and add the lemon juice, nutritional yeast, hemp seeds, some sea salt and pepper (& a pinch of chilli if you want).  Blend with a hand-held blender, or add the lot to whatever blending machine you’re using.

Now’s the time to do a quick taste test!
If your green blend is thick because you used lots of kale, add a little water, however you still want it to have body and not be a runny sauce.  At this point add extra pepper, salt or chilli if your taste buds want.
Put the sauce back into the pan and add the rinsed cannellini beans, heating through and stirring now and again so it doesn’t catch.

When your rice is cooked spoon into two shallow bowls, add your green bean blend and then dollop a tbsp of plant-based yoghurt on top.  Garnish with pumpkin seeds, some basil leaves and a drizzle of oil.  Serve hot or at room temperature.
Enjoy and let me know how it goes 🙂


Cold and flu remedies

Frosty cold days last week here in Dorset has prompted me to share a few of my favourite flu and cold remedies, a round-up of some easy herbals and nutrients.
Whether it’s a cold, flu or Covid there are loads of studies and articles showing how the nutrients below may work, either by shortening the duration of the infection, or by cutting down on the severity – or both.

Garlic (allium sativum)

Most of us will have a garlic bulb or two in the kitchen, ready to use if we suddenly feel a scratchy throat or the sniffles coming on.  Garlic has so much science behind it, inhibiting viral reproduction, boosting our natural killer cells that help fight infection.  Such an effective antibacterial, antifungal and antiviral.

It’s the allicin component in garlic that is responsible for its health benefits – and for its intense smell!  Interestingly, this allicin is only released when you cut into the clove (which makes me often ponder about roasted whole bulbs; delicious, but not much antimicrobial action left).

Maximum benefit is when you eat garlic raw, but that won’t always work in daily life.
When cooked, some of that allicin might remain, especially if you keep to a light, quick steam, however, garlic’s Vit C, B6 and mineral content will be reduced, literally cooked away.

Add a clove or two of garlic to stews or soups at the last minute, just before serving, to keep as many of these benefits alive.
If you’re thick with cold or flu try a garlic broth, pouring hot water over a squeezed or chopped clove, adding grated ginger and miso paste, so easy to digest.

If colds are doing the rounds, a preventative drink to make is chopping 4 garlic cloves in a large preserve jar and topping with boiling water.  Steep the garlic for about ½ hour then add lemon juice and honey, and drink warm as a ‘tea’ up to 3 or 4 times throughout the day.

Precautions:
Very high amounts, eg. a whole RAW bulb (unlikely, but good to be aware!),  can cause digestive upset, heartburn, possibly diarrhoea.

Garlic can also increase bleeding so if you’re on an anti coagulant medication or have a bleeding disorder stick to minimal amounts in cooking, and, if planning to have surgery, avoid for at least 5 days beforehand.
Garlic may interfere with some chemo or HIV drugs as it can influence liver enzymes which help the metabolism of the drug you’re taking.

If pregnant, eating garlic in meals is fine, but high doses as a capsule or tablet are not generally recommended.

Ginger (zinziber officialis)

This is my go-to for everything.  Ginger soothes aches and pains, helps alleviate nausea and digestive problems and is a great anti inflammatory.  With a sore throat, drinking hot water with chopped ginger, lemon and honey will be soothing and supportive as it’s an effective antimicrobial.  Ginger is also warming if you have chills, and it’ll help break a sweat with a fever.

The active ingredients are the gingerols, the main phenols, and shogaols, which inhibit respiratory pathogens and suppress the production of cytokines – chemicals we produce which lead to inflammation.

I like to start my day with chopped ginger in hot water, a herbal ‘tea’ I steep for 10 minutes, topping it up throughout the day and drinking either hot or cold.  This summer I made ginger ice cubes, squeezing grated ginger into the ice tray, then adding the cubes to some cold water and pomegranate juice, delicious.

Like garlic, ginger adds flavour to stews, stir fries and soups and will retain more of its health benefits if added at the last minute.
Ready-bought ginger teabags have very little gingerol in them, however dried ginger is apparently high in these beneficial phenols.  Important to find a reputable source; I recommend Steenbergs herbs and spices online store here in UK.

When full of cold or flu you may not feel like eating, however replacing the water lost from sweating is important.  The above miso broth is great as a light, nutritious and hydrating meal or snack.

Precautions:
Ginger is a safe tuber/spice although high amounts may cause reflux…or, bizarrely, nausea (which, in normal amounts, it helps prevent).
Again, like garlic, it has a mild anti coagulant effect, hence if you’re on aspirin or have a bleeding disorder avoid large amounts.
Because ginger can increase bile production large amounts could potentially aggravate gall stones especially in supplement form.

Ginger in food is safe during pregnancy and can help with morning sickness.

Thyme (thymus vulgaris)

Thyme is another herb you might have growing in the garden, or in a pot in the kitchen.  It’s easily found in most supermarkets.  Thyme has a long history in the Mediterranean as a traditional medicinal plant that’s very effective for coughs and colds.

Not only does thyme contain vitamins and minerals (like garlic and ginger) but its essential oil, thymol, found in the leaves, has powerful antimicrobial properties, especially for upper respiratory infections, working well as an extectorant (clearing mucus).

Add fresh or dried thyme to stews, soups, stir fries, or use it in an infusion.  Add one tablespoon of the herb to hot water, let steep for 15 minutes, then sieve out the leaves and either drink like that or add a little honey and/or lemon.  With an active infection, sip throughout the day to soothe coughs and calm down inflammation in the airways.

Precautions:

If you have any mint family allergies, don’t use it.
Large doses – far greater than the amounts I’ve mentioned – can also cause nausea.

Thyme essential oil should never be ingested.

Thyme in food, fresh or dried, during pregnancy is safe, but, as it may cause uterine stimulation it’s best not to infuse/drink the above thyme tea.

Echinacea purpurea

Echinacea is an excellent broad spectrum antiviral as well as an antibacterial and antifungal.  Often used to support upper respiratory infections, it works a.o. by stimulating the immune system through its bioactive phytochemicals.

Available in tincture or tablet form as well as echinacea herbal tea. The latter, however, isn’t nearly as well absorbed or immune effective.

It can be taken as a preventative, but I don’t recommend long term supplementation.  When I travel I’ll often pack a small bottle of tincture so I can stop a cold in its tracks, dosing 30 drops 3 or 4x daily (this depends on the strength of the tincture, so check the label)

As a preventative, short term, 20-30 drops once a day or 1000 mg tablet is generally the recommended dose.

Precautions:

Due to echinacea stimulating the immune system, anyone with an auto immune disease should be cautious as it could potentially cause a flare.  I’ll generally not recommend echinacea to auto immune clients unless they tell me they’ve tried it in the past and not had problems. There are enough other natural food-based antivirals to use.

If you have an allergy to ragweed or daisies, be aware that the flowering part of the Echinacea plant – not the root – can cause problems.

Ascorbic acid, aka Vitamin C

Vitamin C is probably the most researched nutrient as far as immune support goes, albeit a controversial one when it comes to dosage.

Again, like garlic and ginger, Vitamin C is shown to reduce the duration and severity of colds and flu.  It improves the function of phagocytes – a type of white blood cell that engulfs viruses and bacteria in the blood stream -, and lymphocytes, another white blood cell which fights pathogens.
It also reduces inflammation by lowering the afore-mentioned pro-inflammatory cytokines and is a fab anti oxidant (which is a substance that protects cells from free radicals generated by infection, air pollution, stress, poor diet, smoke, pesticides…)

Foods containing good amounts of Vitamin C are often red or orange-coloured, like strawberries, papaya, mango, persimmons, oranges (all citrus in fact), acerola cherries (Malpighia emarginata), cantaloupe, kiwi fruit, guava, blackcurrants, bell peppers, chili peppers, tomatoes, but also green veg like broccoli, kale, parsley, Brussel sprouts…
Adding these vegetables to your diet when you have a cold will be beneficial overall, but they won’t have the therapeutic effects of lowering cold severity and duration that a supplement will offer.

Recommended dose for prevention, tablets or powder, for adults is c 500 – 1000 mg daily.

With an active cold or flu it’s safe to double this amount, and many will add that it’s safe to take 1000 mg every 3 hours, up to 10,000mg daily.  This is very individual and research studies, pro and contra, are not always reliable or accurate, hence the controversy continues.  Many swear by higher dose C.. and just as many don’t!

Saying all that, a useful indication that you may be over-supplementing is if you reach a point where stools become loose and possibly your gut will feel ‘off’.
Not dangerous, as the body will eliminate what it doesn’t need of this water-soluble vitamin, however, it’s a useful and sure indicator that whatever dosage you reached was too high for you; simply reduce the dose next time, or try buffered Vit C which is easier on the gut.
Also, don’t panic if your urine is yellow as that is the colour of Vit C leaving your body.

Precautions:

Kidney stones (esp oxalate stones) can be worsened by high Vitamin C supplementation.   High doses may also interact with some chemo drugs and with glucose readings.

During pregnancy high doses are not recommended.

Zinc:

This trace mineral is another effective antioxidant which also works a.o. as an antiviral, inhibiting replication and blocking the virus entering the cells, especially rhino viruses.

Zinc lozenges are particularly useful for a scratchy throat.  Best to start at the first onset of symptoms, sucking 3-4 over the course of the day, however not on an empty stomach as it can make you feel nauseous.  Supplement doses vary from 15mg – 60mg, depending on the brand.

Foods containing zinc include oysters (high!), crustaceans, red meat, chicken, seeds and nuts – especially pine nuts – dairy products and some fortified cereals.  Greens and mushrooms a.o. contain some zinc as well, however none of these foods will have the same therapeutic effects as supplementation.

As a preventative in the cold season, one tablet once daily, however if you’re taking a multi be aware of the amount of zinc in it so you’re not exceeding c 60mg.

Precautions:

Zinc can interfere with some medications such as cholesterol-lowering drugs if you take high doses. Zinc has been shown to be toxic at levels around 150mg.
Many zinc nasal sprays have been removed from the market as they were shown to lead to permanent loss of smell.
Chronic overuse can cause something called zinc-induced copper deficiency anaemia which results in neurological symptoms, so treat zinc with respect!

And there we go, my round-up of cold and flu remedies which I hope you’ll find useful.

There are of course more out there such as eucalyptus oil, so good for inhaling, or black elderberry syrup.  If you have any other tried and tested favourites please share here below or on my social media pages.

Wishing you all a cold-free festive season wherever you are in the world x

(at the moment I would happily be sitting in this chair below!)

Gf Chocolate pear cake with raspberry coulis

We’ve had a birthday month – friends and family – so I wanted to try out some new gf recipes, as I’m on a mission to find a perfect one for a wedding next year.
I love this cake because for me hazelnut + chocolate = gianduja which is a fave chocolate of mine.  The cake obviously doesn’t rise, but the pears give it some height and style especially when dusted.
This photo below was my first attempt when I cut the pears into smaller pieces, but I now know quartered pears work best.
You can make it dairy free by using plant-based butter replacements.  I’ve not tried it yet but that’ll be my next taste test.
The raspberry coulis is optional.  Last time I baked it was for a birthday so we had whisked oat cream, raspberry coulis and ice cream for those who wished.  Went down a treat!

I think the cake actually tastes better after a day in the fridge!  Makes the chocolate slightly fudgy, but I’ll leave that to you.  It’s a tough call putting a freshly baked cake away for a day or more, 🙂 but Mr C agreed it tasted better after an overnight in our fridge.  Just saying 🙂

Equipment you’ll need:  23cm or 25cm loose-bottomed tin.
Nut/seed grinder or blender for dry ingredients
Whisk, hand mixer
Baking paper, cut into a circle to fit base
Sieve for coulis

Ingredients

For 8 delicious slices

90g butter (or plant-based), plus 1 tbsp extra for the tin (or use light olive oil for greasing the tin)
70g golden caster sugar, plus extra 1 or 2 tbsp to line the tin
100g 72% dark chocolate, broken up
3 eggs, separated
85g roasted hazelnuts, ground in a coffee or seed grinder
2 ripe large pears, peeled, halved, quartered and cored
icing sugar to dust when the cake has cooked

Method

Heat oven to 180 degrees C (160 fan).  Melt the chocolate and butter (or a butter replacement) in a bain-marie over a pot of hot water.  Stir gently when it’s melted; let cool.
Prepare your tin!
Rub butter or swish a little oil on the tin’s base and sides, then line the base with your circle of greased baking paper.
Find that extra caster sugar mentioned above, spoon and swirl so it sticks to the sides and paper base, tipping out any excess.

Separate your eggs and whisk the whites to soft peaks.  Put aside.

Clean your beaters, whisk the egg yolks with the 70g caster sugar until the mixture is thicker and paler.  Fold this into the cooled melted chocolate together with the ground hazelnuts.
Now add your peaked whites in batches, first, mix half into the chocolate, then gently fold the rest.  Don’t be too rigorous with your mixing ‘coz you want those whites to give your cake some lift.
Spoon your finished wet cake into the tin and arrange your pear quarters on top.

Bake for 30-40 mins.  Check with toothpick or skewer after 30 mins to see if it comes out dry.

Optional easy-peasy Raspberry coulis

This recipe is generous (I am always grateful for leftovers to freeze)

Ingredients

¼ cup caster sugar
2 tbsp water
300 g frozen raspberries, defrosted
optional:  1 tbsp Grand Marnier

Combine the water and sugar in a small pot, stirring till dissolved.  Add the raspberries and gently cook until they’re soft & falling apart.
Cool enough so you can strain it, using a spoon to mush it down through the sieve.  Add the Grand Marnier – or not – to the sieved berry mix and serve either warm, cold, or keep in the fridge up to a week (or in the freezer a couple months).

Serve the cake as is or with whipped df oat cream or regular cream or ice cream.  I know someone will be adding custard, whatever floats your boat!
Give it a try and do let me know what you think.

Roasted curry veg with herby yoghurt

After making this dish about six times in the last month I can truly say it’s become – yet another! – favourite.
It was inspired by Sarah Cobacho’s plantbased baked curry vegetables with raita sauce but I’ve added and tweaked, changed amounts and called the sauce a more prosaic, but equally scrummy, ‘herby yoghurt’ as raita means something else to me.   I’m so happy to have found Sarah’s delicious recipe to play with and reinvent.  I hope you enjoy playing as well, and making it your own.

Ingredients

2 very generous servings… or 4 modest ones

The herby yoghurt sauce:

250 g plant-based yoghurt (I used Greek-style Koko or Alpro; thicker, creamier than most other plant-based)
1 heaped tbsp grated ginger
2 cloves garlic
juice of one lemon
1/2 tsp cumin
1/2 tsp garam masala
small bunch coriander, (chopped = about ½ compact cup)
small bunch mint, chopped = c ¼ cup)
chili flakes (optional, for the chili lovers out there.  The roasted veg below also have some chili)
sea salt to taste

The veg and protein:

350g small or new potatoes with skins, halved
½ small butternut squash, peeled, cubed
½ cauliflower, cut into florets
½ broccoli, ditto florets
1 red onion, cut into 1/8
150g cherry tomatoes
250g cooked chickpeas (I used left-over cooked lentils one time instead; also worked although I added them later, with the kale, so they kept soft)
big handful of shredded kale
40 g roasted slivered almonds, to decorate the finished bowls

The oil mix to slather

½ cup olive oil
1 tsp garam masala
dash, or more, of chili powder or flakes
2 tsp curry powder
juice of one lemon

Method:

Use three bowls – 2 small, one large – for your vegetables.  The two small ones are for the potatoes and kale resp. and the large will hold the rest of the vegetables and cooked chickpeas.
Mix all the oil ingredients together and massage into your respective veg bowls.

Preheat your fan oven to 180 C.
Blend the sauce ingredients at least 1/2 hour before needed so the yoghurt sauce isn’t too ‘sloppy’.  Ideally make the sauce ahead of time, the day before, and refrigerate.
As always, taste test to see if you want to add more of any sauce ingredient you especially love.

Place the halved and oiled potatoes on the oven tray and roast for 15 minutes.  Flip over and add the rest of the vegetables and chickpeas (not the kale), and roast for another 20 minutes, adding the oiled kale for the last 10 minutes.  Test with a fork to make sure it’s the texture you like, and be mindful nothing roasts ‘dry’ or burns.

To serve: spoon the green yoghurt sauce into the base of the bowls, then top with roasted vegetables and chickpeas.  Scatter the roasted almonds on top, delicious!

Butternut soup

A hearty soup for this week’s cold snap, here’s a butternut, sweet potato & carrot combo which is a powerhouse of fibre, vitamins and minerals.
The colour alone tells us it’s loaded with beta carotene.  This is an antioxidant we convert to vitamin A, which supports our immune health, our vision, skin, reproduction, lungs, heart… & the list goes on.
Such a well tolerated soup, I always share it with clients who want an easy nourishing recipe.
And if you’re not a fan of garlic just leave it out; same with the onion (or you could try replacing it with the green part of a leek).
This soup freezes really well, so it’s ideal for batch cooking.

Ingredients

(for 6 small or 4 large soup bowls)

Olive oil, a generous dollop
1 red onion, chopped
500g butternut squash, roughly chopped
200g sweet potato, also roughly chopped
200g carrot, ditto…
2-3 garlic cloves, squeezed
fresh ginger, 3 cms peeled & finely chopped
1.2 litre veg broth
lime juice from 1 lime (optional)
coriander leaves to decorate
pumpkin or sunflower seeds also to decorate (missing in the photo, oops!)

Method:

Gently heat the olive oil then add the chopped onion and stir occasionally until transparent.  Next add all the vegetables and half the chopped ginger.  Stir briefly before pouring your broth into the mix.
Cook on a medium heat for about half an hour until the vegetables are soft, then add the squeezed or chopped garlic cloves and the rest of the ginger.  Adding these at the last minute will mean their flavours are more potent, and the beneficial phytonutrients in the garlic and ginger not completely ‘cooked away’.
Cool a little before blending, then add the lime juice and decorate with sprigs of coriander or parsely, and toasted or raw pumpkin seeds. Drizzle with a little olive oil and enjoy!


Glenys’ vegan oriental rice

Sometimes we need easy and straight-forward recipes especially if juggling work and life.  This rice dish has been in my heart and on our family table for many years.  It’s one of several a dear Sydney friend, Glenys, shared a long time ago, written in her lovely script in my now raggedy falling-apart recipe book.  Everytime I make a Glenys dish it’s such a mindful meander down memory lane I want to call her instantly, then I realize it’s way past midnight in Sydney.


Growing up, I was never a fan of rice salads.  Usually very white, sometimes gooey, and not enough going on in them to win me over.   The combo here of snibbled crispy veg with nutty and/or seedy crunch plus the tamari-lemony garlic works a treat.
I can’t say I’ve found any other rice salads I love as much apart from one with lentils, so if you have a secret scrummy rice salad please share with me anywhere you want – text, email or even snail mail (how I’ve loved these past weeks of hand-written post! Thank you to all snail mailers, let’s keep it going xxx)

This salad could be part of a shared feast, or enjoy with supper or lunch alongside any protein you love.
Do tweak the amount of tamari or garlic or lemon so it suits your tastebuds before you lavish it over your finished creation x

Ingredients

For 4

250g  brown or mixed rice (eg.wild, red & brown basmati)
5  spring onions (or 3 large ones), finely chopped
1 red & 1 green pepper, finely chopped
2 smallish carrots, finely chopped
3 tbsp sunflower and pumpkin seeds
150 g almonds, toasted and roughly chopped (last time I used some left over delicious Spanish Marcona almonds and didn’t roast);   1 tbsp to decorate at the end
150g cup currants (soak if you’ve had them stored far too long, overnight or at least 6 hours)
One generous handful, or 120g each, of chopped coriander and parsley

Dressing:

120g cup olive oil or avocado oil
3-4 tbsp gf tamari sauce (start with 3 then taste test and adjust if necessary)
3 tbsp lemon juice (ditto)
2 cloves garlic
sea salt & freshly ground pepper to taste

Method

Cook the rice and let cool.  Meanwhile toast the skinned almonds until golden brown, cool and chop roughly.  Mix all the finely chopped vegetables and herbs with the currants, nuts and/or seeds, and the cooled rice.
Pour over dressing and mix; top with tbsp chopped almonds.
Can’t get much easier, right?

Vegan savoury strudel, gf and df

This recipe was inspired by Elke’s Austrian take on a Greek spanakopita (spinach pie).  Instead of the usual triangle slices of a traditional spanakopita, she opted for the strudel “log” shape, and added loads more delicious spinach than one normally finds in these pies.
I’ve tweaked the recipe yet again by adding more vegetables to the spinach.  So it’s no longer a spanakopita but a roasted sweet potato, spinach and leek ‘strudel’!  And with a gluten-free puff pastry and dairy-free fetta; a vegan version to see how it works.
Worked a treat!

The store-bought ‘Jus-roll’ gluten-free puff pastry makes it all so very easy and quick.  And Violife’s vegan Greek fetta is delicious and a great option for anyone going vegan, or with a casein (dairy protein) or lactose intolerance.
You can steam the sweet potato cubes, definitely the healthy option, but as I was roasting a lunch the day before I decided to add the sweet potato cubes to the oven; also the pine nuts right at the end.  Less work the following day when I was playing with this recipe.

Ingredients:

For six slices

1 packet Jus-roll gluten free puff pastry (or regular Jus-roll puff; or filo.. shortcrust, whatever you like)
400g packet spinach, roughly chopped
green part of one leek, finely sliced
3 cloves garlic, squeezed (two at the start, one added near the end)
1 large sweet potato, about 250g, cubed, then either roasted or steamed before you start your log
dollop of olive oil for a light fry and to lightly brush onto the log before baking
80g toasted pine nuts
100g Violife ‘Greek white’ (or non vegan, regular Greek fetta)

Method:

If you haven’t roasted your pine nuts, nor your cubed sweet potato, do this first.  When done put aside where no one will be tempted to have a nibble.

For the filling, pour a couple of tablespoons of olive oil in a pan on a medium heat then add the sliced leek and 2 of the pressed garlic.  Gently fry until the leek’s transparent.
Toss in the roughly chopped spinach and wilt.  Hover near the pan otherwise your delicious leafy spinach pile will vanish to an overwilted green sludge.  The same goes for the pine nuts, keep close, for if you leave the kitchen even for a moment they are bound to burn.  Hover.  Keep watch.

Add the roasted/steamed sweet potato cubes to the pan of spinach to warm through, then that last garlic clove.  Stir in the roasted pine nuts.

Wait for everything to cool before adding the crumbled fetta.

With ‘Jus-roll’ you can literally unravel it from the box and start filling it with your cooked veg, so easy.
However, if it’s too thick for your taste roll it thinner and larger.  Whatever you decide, ensure you have parchment underneath it (the paper it comes wrapped in its box), so you can easily lift the filled roll onto the oven tray.

Spoon the filling along the long side of half the pastry, leaving a clear 2-3 cms edge all around so you can seal it without the filling oozing out.  To make your log just fold over the pastry and, with water-wet fingers, press the edges closed then go over them with a fork to create a neater, tighter finish.  Brush with oil and prick the pastry, to stop a gap forming inside as it cooks.

Bake in a moderate fan oven, about 180 C degrees (c350 F), until light golden brown, approx 30 – 45 mins (depending on everyone’s unique oven.  Like us, they have personalities and might decide to take longer to colour your strudel).

Slice and serve with a leafy colourful salad, or as part of a delicious summer garden spread.

Kali oreksi! Bon appetit x


GF/DF vegan mushroom lasagne

I’ve based this recipe on Ottolengh’s fab spicy mushroom lasagne from his ‘Flavour‘ recipe book, making the necessary changes so that it’s suitable for vegans, as well as gluten and dairy free.

This recipe is true to Ottolenghi’s exotic cooking style; definitely not a whip-it-up-quickly meal.  The layer upon layer of a lasagne translates to several ‘meanwhiles’ in the method section, but don’t let that put you off.  This is truly a recipe to enjoy, a lesson in being present with all the processes in play, from chopping to blending, roasting, soaking.  You name it, it’s happening here!  And this is why it’s such a winning recipe, all these delicious layers upon layers.  I’ve numbered the steps, which wasn’t in the original, but I think it might’ve helped me along.

Luckily a lot can be cooked in advance – always good news. An asterisk marks the point you can prepare it the day before refrigerating overnight.

Instead of the original Ottolenghi double cream, parmesan and pecorino I’ve used oat cream, vegan cheddar and a gluten & egg-free lasagne like Freee rice lasagne, easy peasy.

An aside: many cheeses like parmesan and pecorino (in the original recipe) use animal rennet  – eg. from sheep’s stomach – in the cheese-making process. There are, however, vegetarian rennets readily available so check your cheese labels, or stick to the vegan cheddar-lookalike I’ve used here. Perhaps where you live there are also vegan parmesan-type cheeses? (also perhaps where I live, but they’ve eluded me 🙂 Do share if you’ve found them).

Ingredients:

For 6 people
Equipment: large cooking pan, large and small bowls, sieve, measuring jug, food processor (or very sharp chopping knife… and some willing helpers!), rimmed oven baking tray, rectangular baking dish 30cm x 20 cm, and probaby a few other bits I’ve forgotten, but I’ve listed the stand-outs for me

800g chestnut mushrooms halved
500g oyster mushrooms, roughly chopped
60g dried porcini mushrooms
30g dried wild mushrooms
130ml olive oil
chilli, 2 dried, roughly chopped.  If you like extra hot, leave in the seeds
1 red onion, peeled, quartered
5 garlic cloves, chopped or grated
500 ml hot veg stock
1 medium carrot, rough chunks
2 tomatoes c 250g, quartered
80g tomato paste
130ml oat cream
160g Violife grated vegan cheddar cheese,  or another vegan ‘hard cheese’ equivalent (or two different ones)
5g basil leaves, finely chopped
10g parsely leaves, finely chopped
250g Freee Rice lasagna, or a vegan lasagna of your choice
sea salt and ground pepper to taste

Method

1) The oven:  Preheat to 230 degrees C fan oven (250 conventional oven; 446 Fahrenheit).

2) The fresh mushrooms: Either chop by hand or put the oyster and chestnut mushrooms into a food processor in batches, and pulse till finely chopped.  Add to a large bowl with 4 tbsp of the oil and 1 tsp salt, mix, then spread on a large parchment-lined rimmed baking tray so that it’s an even layer.
Bake for 30 minutes, stirring a few times so it doesn’t catch.  The result will look considerably less as a lot of the water has been baked away.  All good!
Remove and put aside, then turn down the oven to 200C (c. 390F) and sit with a cuppa whilst you read on…

3) Meanwhile, the dried mushrooms:  Combine in a medium bowl both sorts with the chilli and your hot veg stock.  Let soak for half an hour then strain the liquid, squeezing as much as possible from the mushrooms so you end up with c340 ml (just top up with water if you have less, or squeeze those ‘shrooms a bit more).
Set aside the liquid.  Chop the rehydrated mushrooms and finely chop the chilli, and also set aside.

4) Now to the onion, carrot and garlic!  Chop them in the food processor – or by hand – then put into a pan with 60ml of your olive oil and fry for 10 mins, stirring till soft and golden.

5) The tomatoes:  Pulse them in the food processor till finely chopped and add, together with the 80g tomato paste, to your fried onion/carrot pan.
Salt and pepper this to your taste and cook for about 10 mins, stirring now and again.

6) Add the chopped chilli and all the mushrooms – those roasted ones, the rehydrated ones – to your carrot/onion/tomato pan and cook for 10 mins.

7) The ‘ragu’ (or ragout, whatever you prefer), is almost there, hooray!  Stir in the reserved stock and 500ml water.  Simmer for 20-30 mins, adding more water if your meaty-looking ragu looks like it’s getting too dry.
Stir in 100 ml oat cream and simmer another few minutes (just to ensure it’s well mixed).  Remove from the heat, and sit back, take a slow breath and be happy that you have just created a delicious meaty-textured mushroom ragout which you will now (or tomorrow) layer into a lasagne.
* At this point you can pop it in the fridge, covered, and continue the following day.

8) The cheese:  Mix the grated vegan cheddar (and/or parmesan-ish vegan cheese) and the chopped basil and parsley in a bowl and prepare to start assembling your layers.

9) Layering your lasagne:
Spread approx 1/3* the mushroom ragu in the bottom of a 30cm x 20cm rectangular dish.
Top with approx 1/3 of cheese mixture, then top this with your lasagne sheets, breaking it into bits to fit corners.
*Ottolenghi states 1/5, not 1/3.  I’ve made this three times now, and so far 1/3 works best for me.
Repeat until you finish with a final layer of mushroom sauce and vegan grated cheese.

10) drizzle 1 tbsp oat cream and 1 tbsp oil and cover with foil or baking paper.
Bake approx 15 mins before removing the foil/paper.
Increase your oven temp to 220 C fan (240C conventional; 425 F) and bake another 10 minutes, turning your rectangular dish around so everything is evenly browned.
11) Set aside to cool, drizzle over the remaining cream and oil and sprinkle with parsley.

12) Bravo! You’re ready to serve.
And after all this, just a leafy green salad with chopped herbs and any other salady bits you have at hand will be perfect 😉

A nerdy note to share with practitioners/foodie peeps trying a low FODMAP diet*
(For all other readers, you’ve been warned!)
:

I was working with three SIBO clients, all keen on the low FODMAP* diet, at the time I was playing with this vegan version. I decided to try turning this recipe into a low FODMAP (why???  Most mushrooms, tomato, tomato puree, garlic, onion, chilli…are all high FODMAP foods).
Yes…. well, there was a wild-eyed glimmer of hope when I saw that oyster mushrooms are low in FODMAPS.  Tomatoes, too, in small amounts, ie. 45g of chopped and 25g tomato paste, according to the Monash FODMAP guide
So I only used oyster mushrooms and a smaller amount of tomato and paste.  I replaced the onion, high FODMAP, with the chopped green part of a leek (low).
No chilli as it’s high FODMAP, hey ho, so the ‘spicy’ component of the recipe vanished.  However, any of my clients with SIBO related gut distress will totally go along with this.  I made more of the basil by making an olive oil, basil, pinenut type pesto (pine nuts are low FODMAP nuts).
Aged dairy cheese is a lower FODMAP food, but sticking to the vegan option you can use something like Violife’s grated ‘mature’ ,as I’ve done in the above vegan recipe, as it’s free from dairy, preservatives, lactose, gluten, nuts and soya.

For those who have stuck to the end of this read, huge congratulations!  This low FODMAP version is indeed a very different meal to the one I’m posting today, but it was very tasty plus a good option for anyone who loves mushrooms and wants to add to their low FODMAP vegan repertoire.

*Low FODMAP diet is a short-term diet restricting certain poorly absorbed carbs which can ferment in the colon and cause IBS-ish discomfort in some people.  Some clients do very well on it, as it can calm down inflammation and give the GI tract a break whilst waiting for the results of tests, or trialling some supplements.  It should, however, only be a short-term diet as it excludes too many health-giving foods.
Btw FODMAP is the acronym for the carbs which are too many and complicated to write in the swing of a recipe, but FYI it stands for: fermentable oligosaccharides, disaccharides, monosaccharides and polyols.  FODMAP, much easier, right?

Cauliflower-corn soup

I love this recipe which is an altered version of  Anna Jones’ chowder.   Sometimes I find chowders too bland or too heavy-creamy or too coconutty, so I tweaked the original to our taste – a bit more of this, a bit less of  t’other – and am calling it a soup instead of chowder.
It’s quick and easy to prepare and has elicited several yums around the table when I’ve served it to friends.  Definitely my happy new recipe for 2024.

There are several herb and spice options, depending on your likes.   In this recipe I’m suggesting 8 crushed dried curry leaves and/or a generous tsp of ground garam masala in the cooking.
However, if you don’t fancy these spices you could just add chopped any-herb-you-love as a finishing touch with the rest of the topping; either coriander, parsley, basil…

Ingredients

Serves 4
Dollop of olive oil for the pot
1 leek, thinly sliced
4 cloves garlic, crushed
8 dried curry leaves
1 tsp ground garam masala
600g cauliflower, cut into florets (leaves removed and shredded for topping)
2 tins (260g each) corn, or frozen corn, or fresh kernels from 4 cobs of corn
1/2 400mg tin ie. 200mg coconut milk (you can cover the remaining 200gm in glass jar; refrigerate up to 3 days)
900 ml rich veg stock
juice of 1 lemon

Topping

4 spring onions, finely sliced
about 3-6 cauliflower leaves depending on size.  Stripped from the stem (or not, if the stem isn’t tough)
olive oil to drizzle
3 tbsp almonds, roughly chopped (& roasted if you have time)

Method:

Heat the oil in a large pot and add the leek.  Cook on a medium heat for 10 minutes until soft, but not charred.
Add the garlic, garam masala/dried curry leaves (crushed with fingers), a pinch of sea salt and pepper.
Pop in the broken-up cauliflower, most of the corn – save about 20 kernels for the topping -, the veg stock and coconut milk.
Bring to the boil then reduce the heat to a gentle simmer for 20 mins until the cauli is soft.

Use a hand-held blender to loosely blend so it still has some texture.
Add the lemon juice, taste, then perhaps more pepper or salt or lemon, then taste again and adjust to your version of perfect.

Topping:

Add a little olive oil to the pan then toss in those 20 kernels, the sliced spring onion and as many shredded cauliflower leaves as will balance nicely with the rest (I shredded 6 small leaves but stripped them from the white stem as it was very tough!)
When the corn is charred and the greens wilted, add the chopped almonds. You can toast these first if you have time on your hands.  I used some delicious Spanish Marcona almonds because they were there.
Scatter this lovely green, nutty mix on top of the soup with a drizzle of olive oil.

Buon appetito!